The app’s flow will start with the employee using the Canvas App to submit a leave request form. Once that form is submitted, an email is sent to the supervisor, and, simultaneously, a new row is added to the Model-Driven App with the new leave request entry. Once the supervisor has approved or rejected the request, the employee will receive an email with the decision.
Pre-requisites
- A Microsoft PowerApps Trial Plan 2, this can be a Free Trial
- Ensure you are using an environment with a database
Common Data Service (CDS)
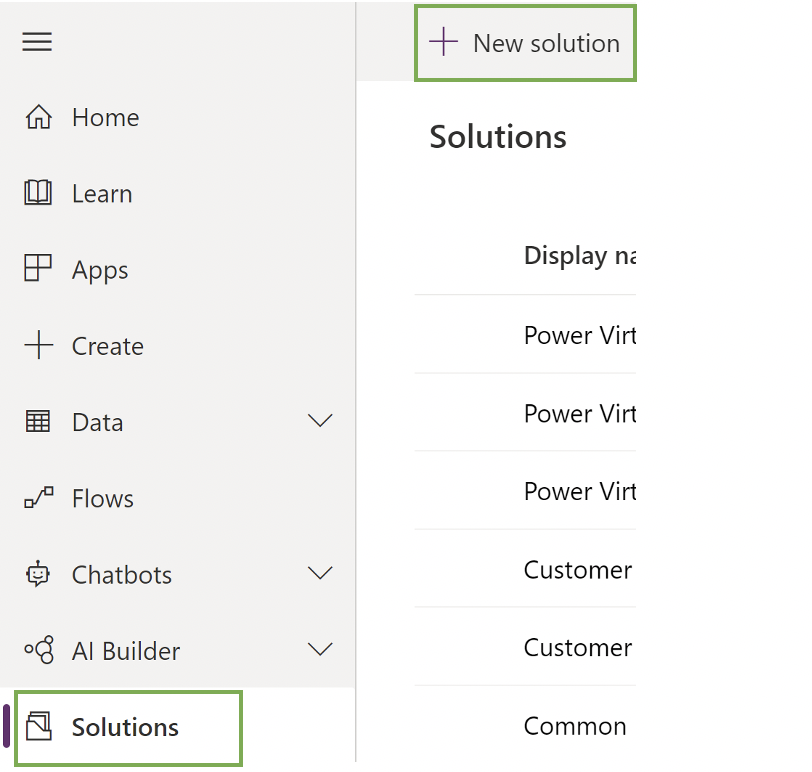
- Navigate to https://make.powerapps.com/
- Create a New Solution called “Leave Request Solution”
- Create a New Publisher called “Leave Request App”
![Create a New Publisher]()
- Create a New Publisher called “Leave Request App”
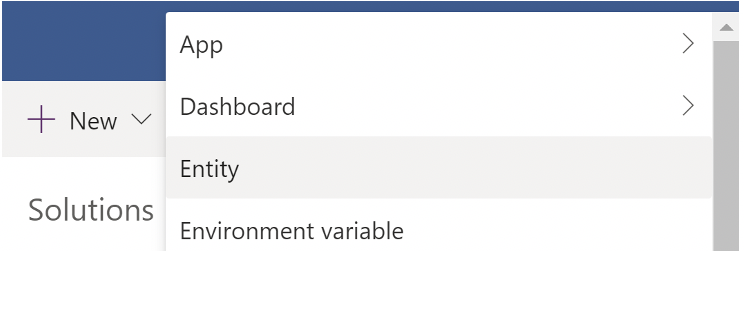
- Select New > Entity name it “Leave Request Entity” and Enable Attachments
![Enable Attachments CDS]()
- Select Add Fields
![Add Fields DSC]()
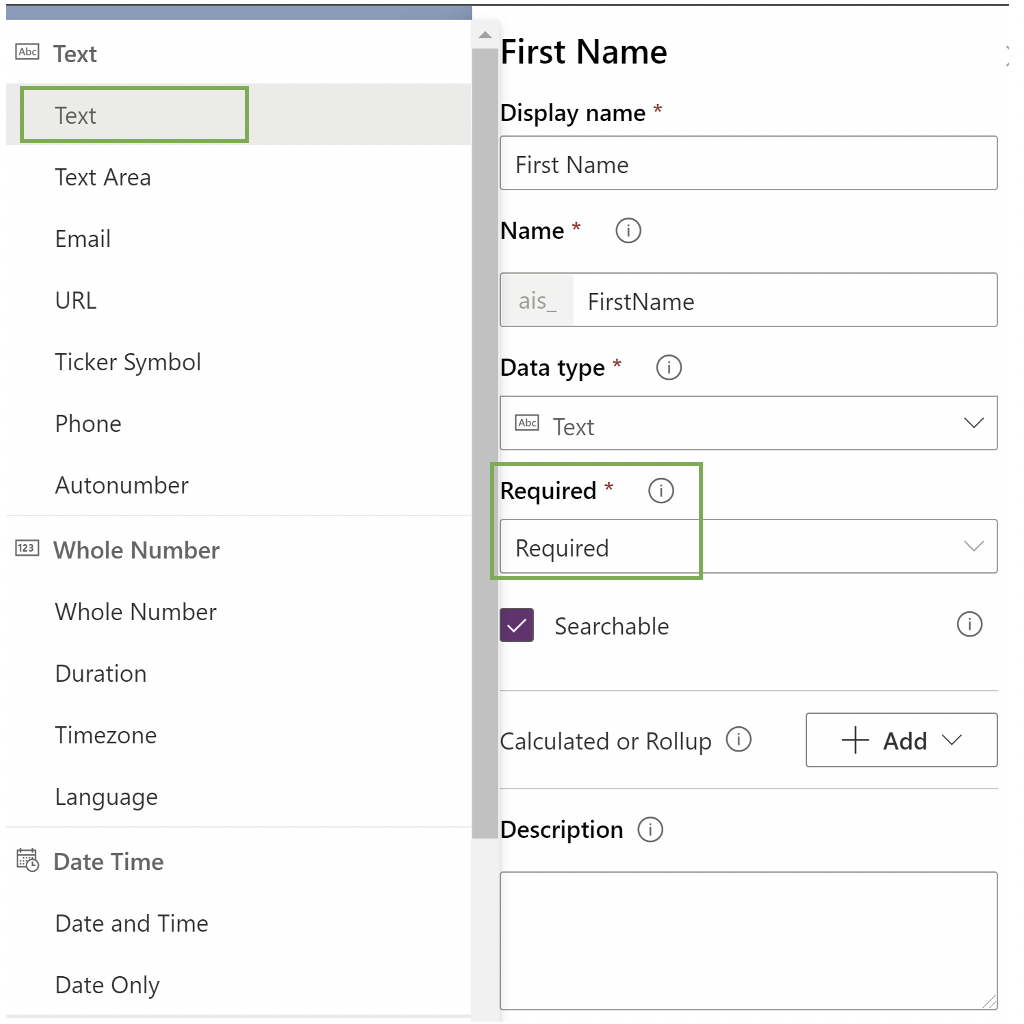
- Add Field: First name
- Data Type: Single Line Text
- Required
- Add Field: Last name
- Data Type: Single Line Text
- Required
- Add Field: Email
- Data Type: Email
- Required
- Add Field: Supervisor Email
- Data Type: Email
- Required
- Add Field: Start date
- Data Type: Date Only
- Required
- Add Field: End date
- Data Type: Date Only
- Required
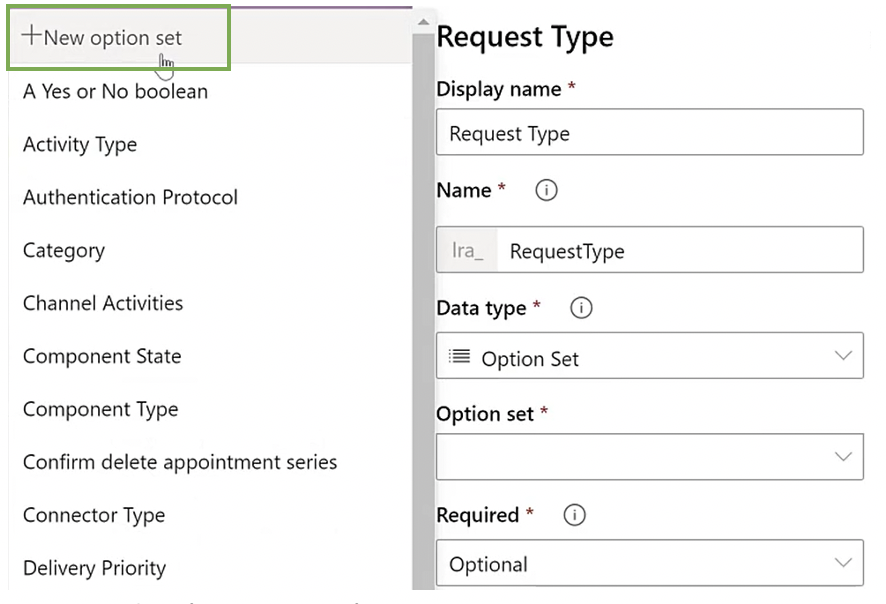
- Add Field: Request Type
- Data Type: Option Set
- Create New: “Request Type”
![Request New Option]()
- Create New: “Request Type”
- New Option: Vacation Leave
- New Option: Sick Leave
- New Option: Military Leave
- New Option: Bereavement Leave
- New Option: Jury Duty
- Data Type: Option Set
- Add Field: Work Items
- Data Type: Multiline Text
- Required: Recommended
- SAVE ENTITY
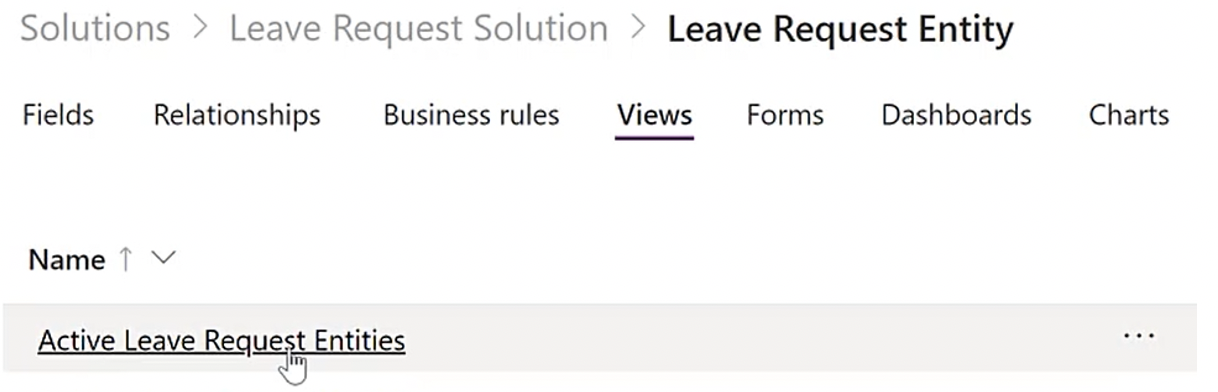
- Navigate to the Views tab
- Select Active Leave Request Entities
![Leave Request Entity]()
- Right-click on Created On Column > Remove
- Add Last Name by clicking the field on the left
- Add Email by dragging the field to the editor
- Add Start Date
- Add End Date
![Add Start and End Date]()

- Once your View looks like the above, click Save, Publish, then Back
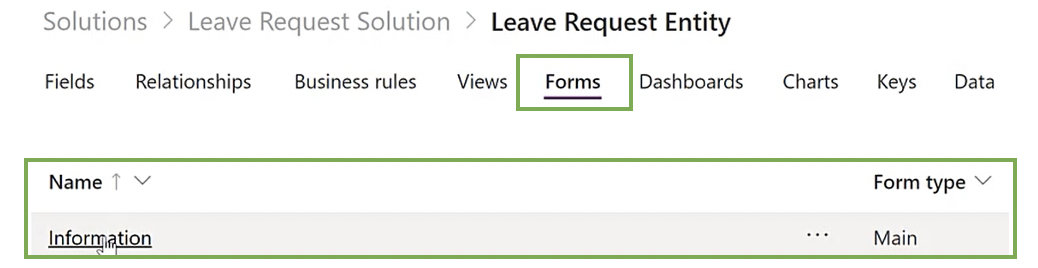
- Navigate to the Forms tab
- Click on the row with the Form type “Main”
![Form type “Main”]()
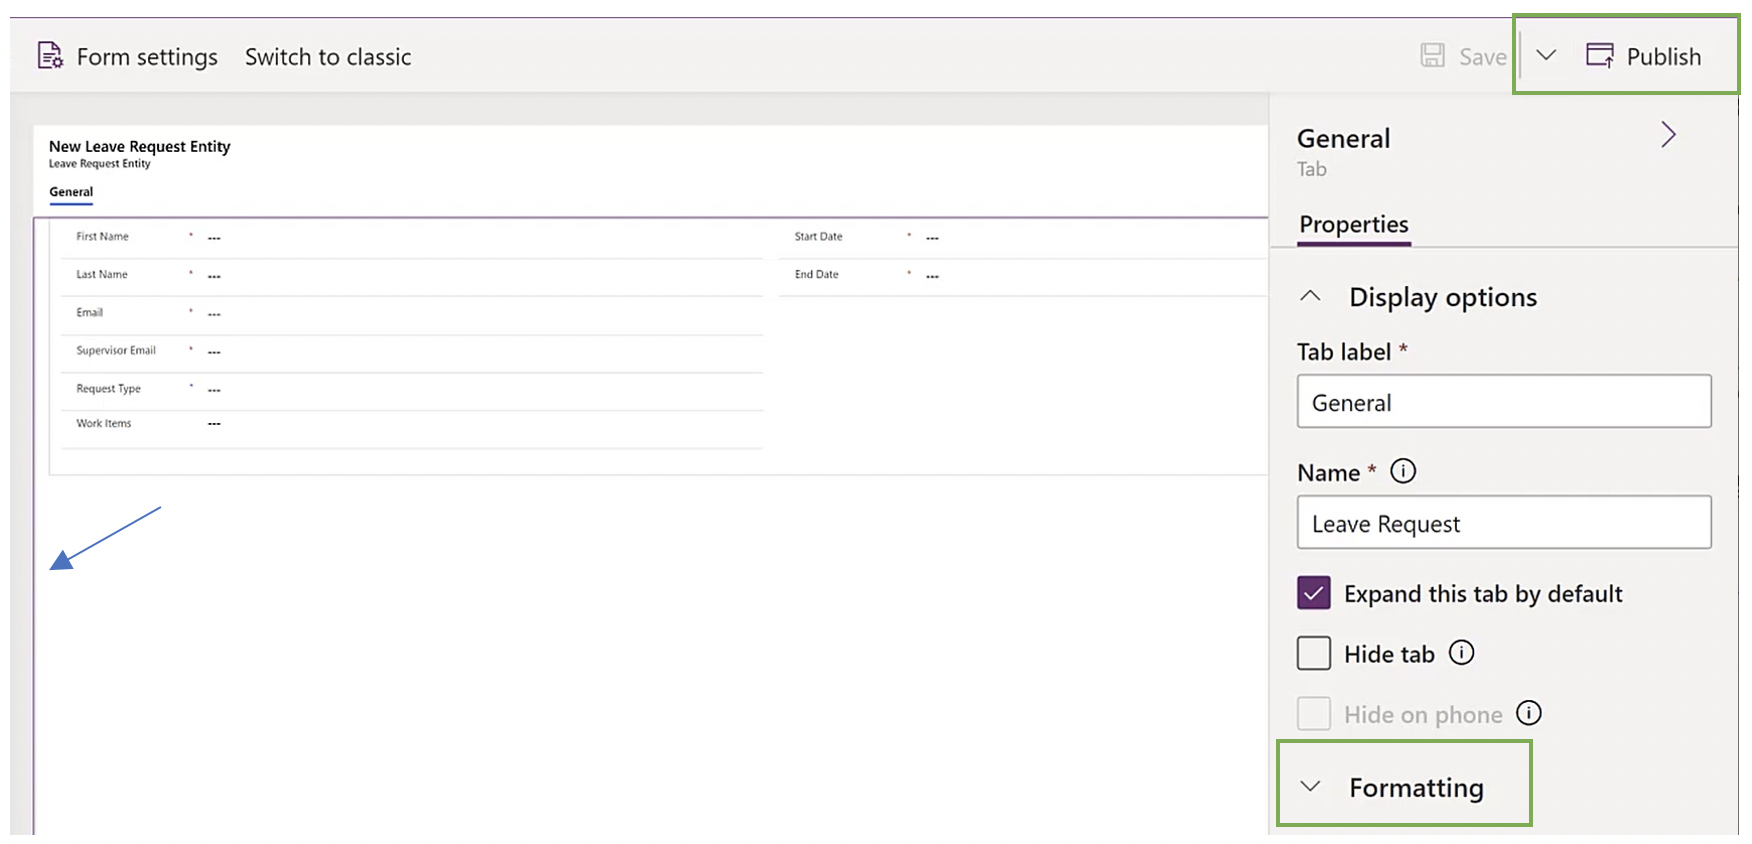
- Add all custom fields by clicking them directly on the left
- Select the section so that it is outlined in purple
- Click Formatting on the right, select 2 columns
![Formatting]()
- Click on the row with the Form type “Main”
- Once your Form looks like the above, select Save, Publish, then Back
Model-Driven App
- Navigate to the “Leave Request Solution”
- Select New > App > Model-Driven App
- Name it “Leave Request Back Office”
- Check “Use the existing solution to create the App”
- Select Next
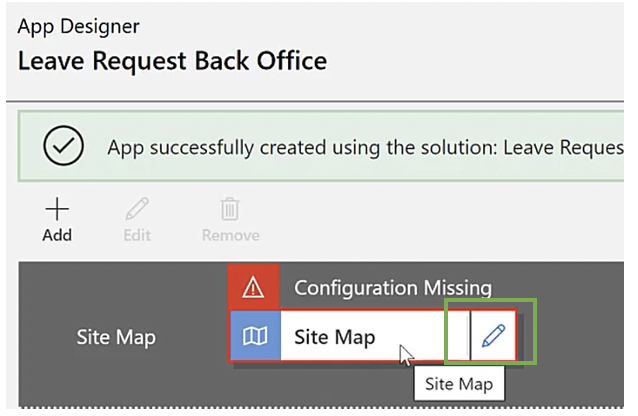
- Select Solution: * “Leave Request Solution”
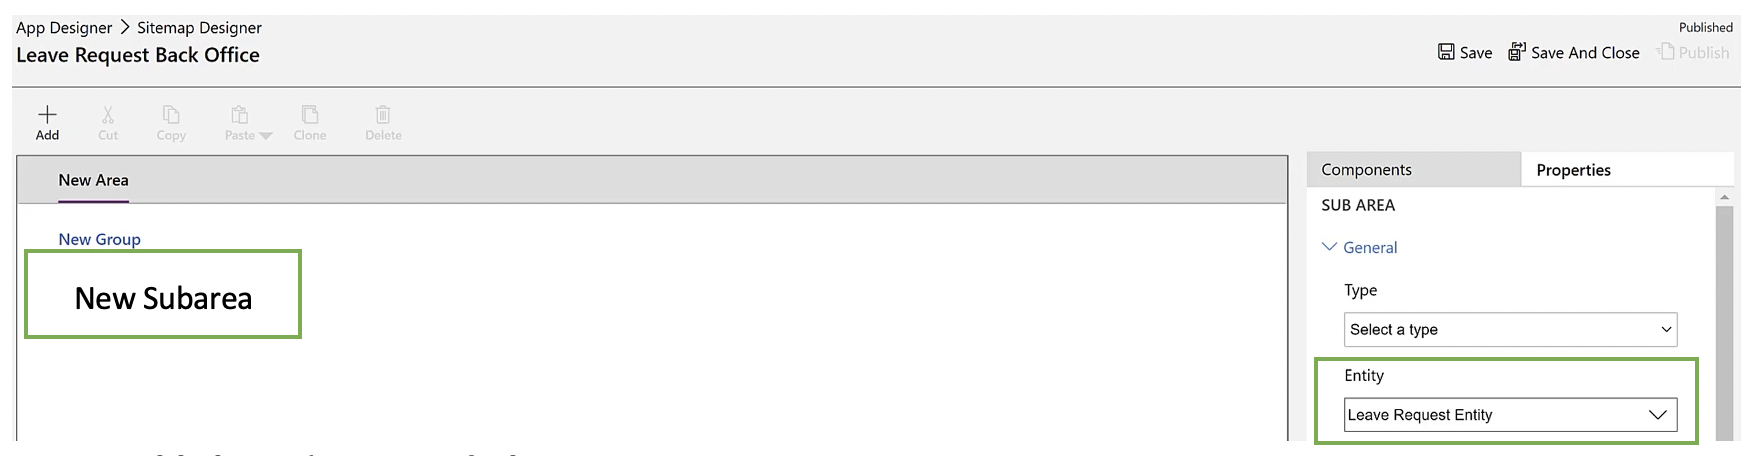
- Select Site Map to configure it
![Select Site Map to Configure]()
- Select the pencil next to New Subarea
- Select the “Leave Request Entity” from the dropdown on the right
![Leave Request Entry from dropdown]()
- Publish, and Save and Close
- In the App Designer view, select Publish then Play
- Select New
- Add test data
- Select Save & Close
Canvas App
- Navigate back to the “Leave Request Solution”
- Select New > App > Canvas App > Tablet form factor
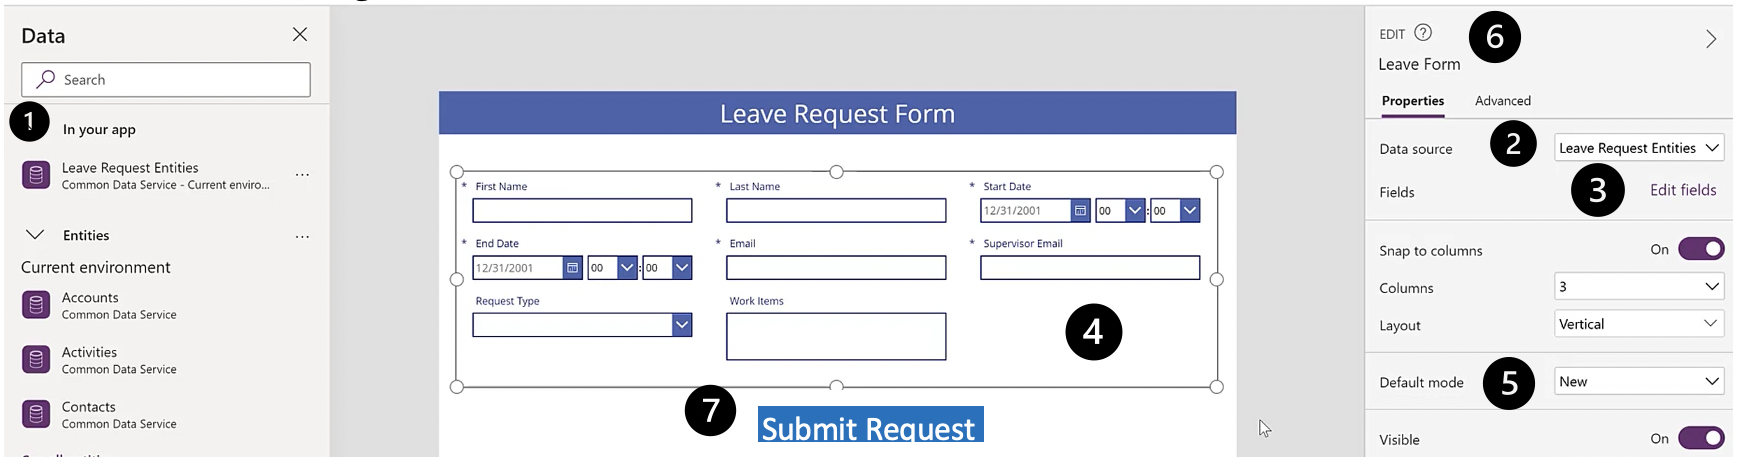
- Select the Insert tab > Forms > Edit
- A box will appear in the editor, select Connect to data
- Select “Leave Request Entities” on the left
- Under Data source on the right, select “Leave Request Entities”
- Select Edit Fields
- Add the remaining fields in the popup modal
- Set Default mode to New
- Change name to “Leave Form”
![Change Name to Leave Form]()
- Navigate to Insert tab > Button
- Select OnSelect from dropdown
- Type “SubmitForm(‘Leave Form’);Navigate(Screen2);” in the functions(fx) box
![Functions box]()
- Select Text from dropdown and type “Submit Request”
- Navigate to Insert tab > New Screen > Success
- Navigate to the File tab > Save > Publish > Play
![Save and Publish, then play]()
- Add test data, select Submit, navigate back to the Model-Driven App to see the new entry


Power Automate
- Navigate back to the “Leave Request Solution”
- Select New > Flow
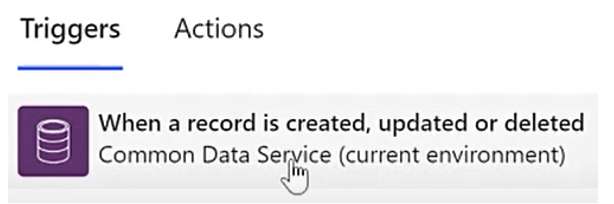
- In the search box type “When a record is created” and select the Common Data Service option
![Common Data Service Trigger Box]()
- Fill in the trigger box:
- Select New Step
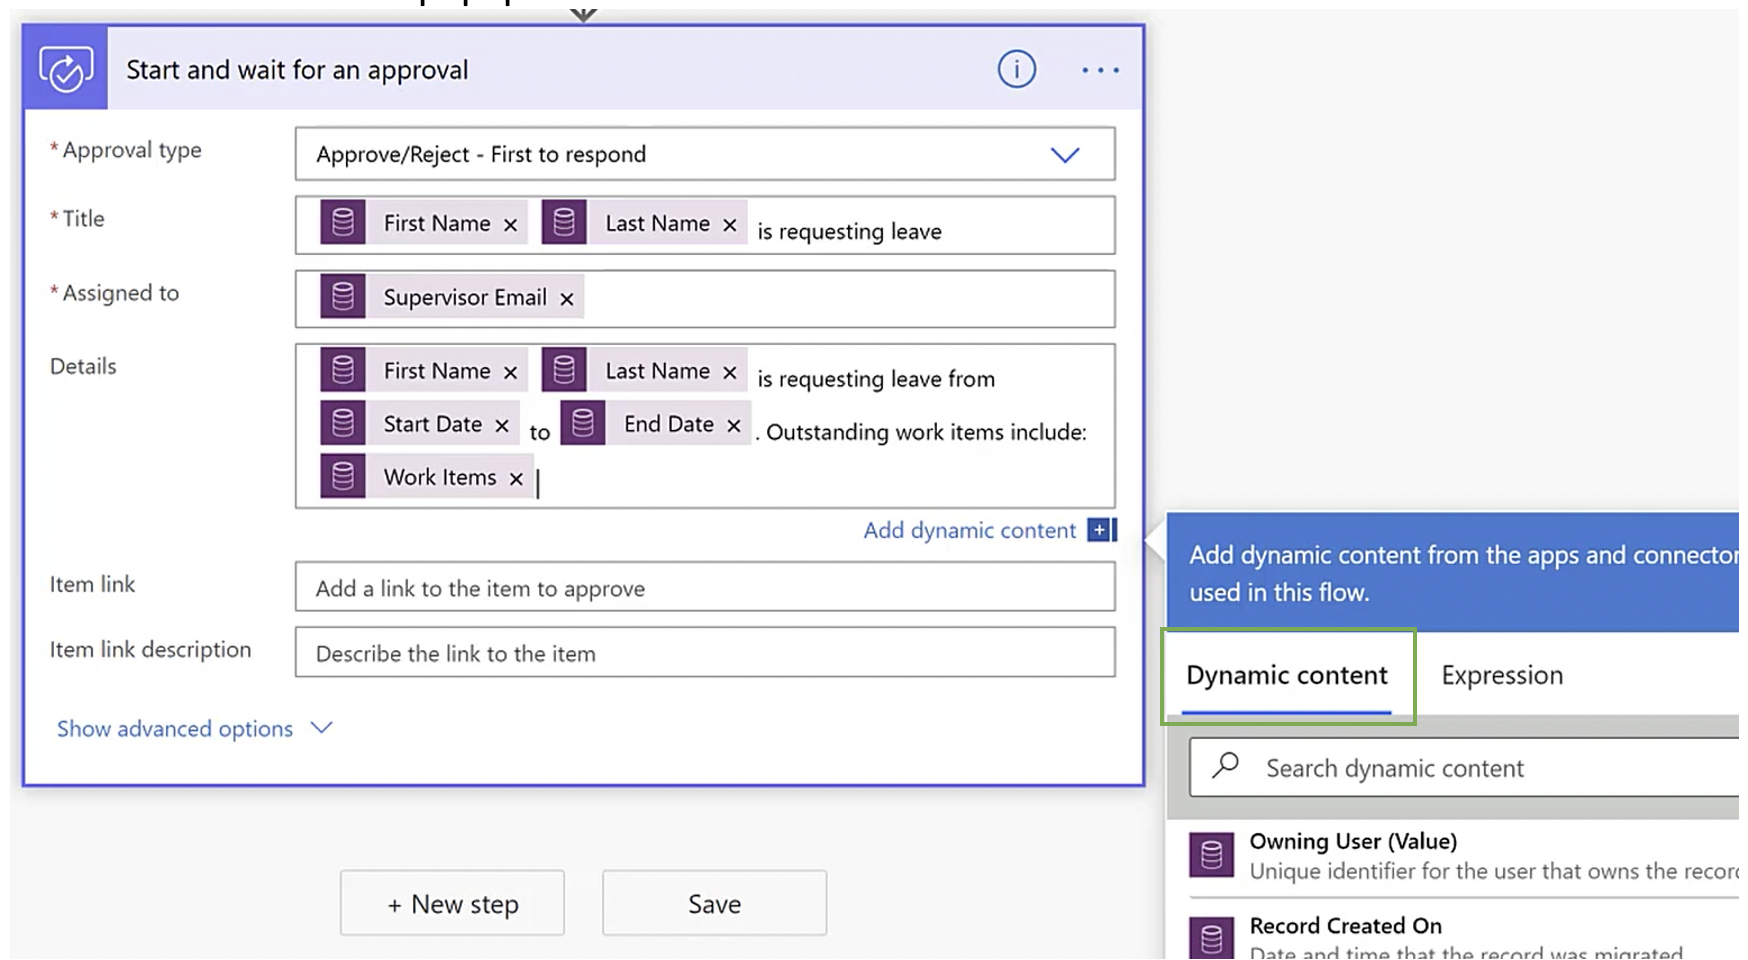
- Then the Choose an Action box, type “Start and wait for an approval” in the search box and select it
- Fill in the action box using the Dynamic Content box
- Click inside the input field and then select the correct dynamic field from the Dynamic Content popup box
![Dynamic Content Box]()
- Click inside the input field and then select the correct dynamic field from the Dynamic Content popup box
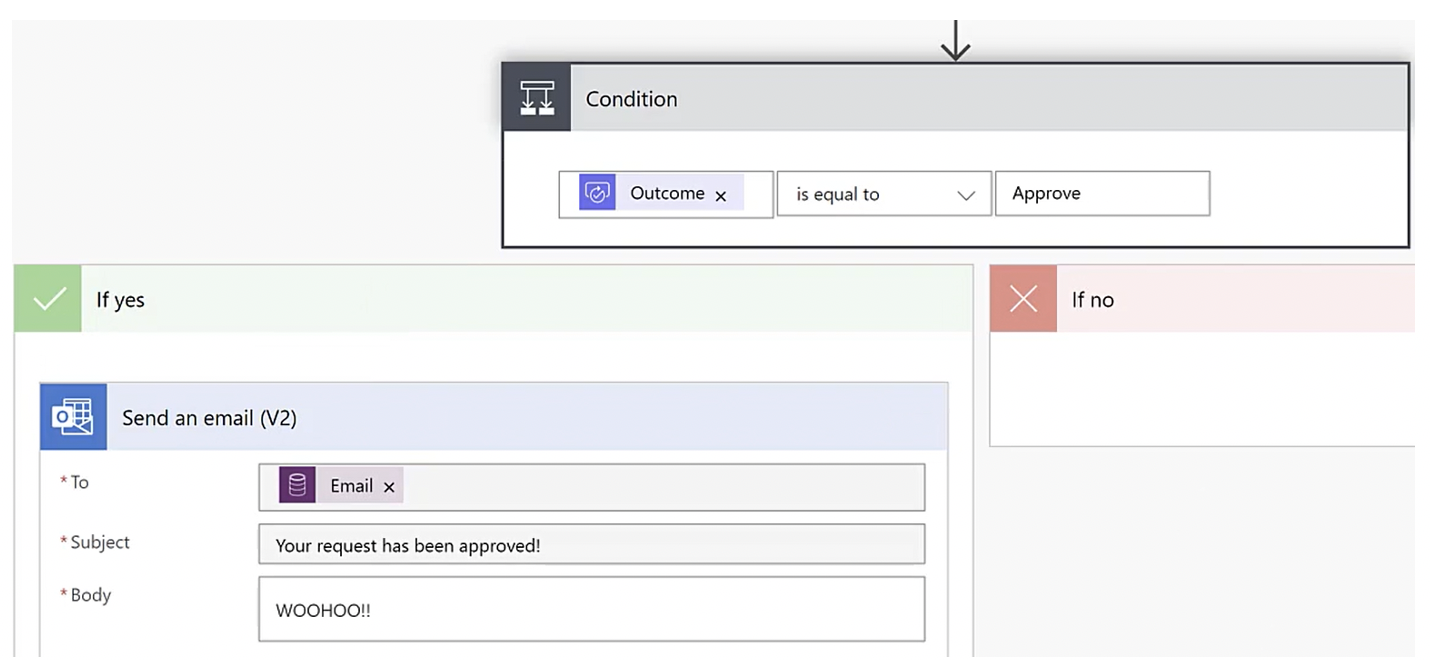
- Select New Step
- Select Condition
- Fill in the boxes:
![Fill in the Boxes for the Trigger]()
- Select Save >Test > Check “I’ll perform the trigger action” > Select Save & Test
- Navigate to your Canvas App, select Play, add test data, and Submit Form
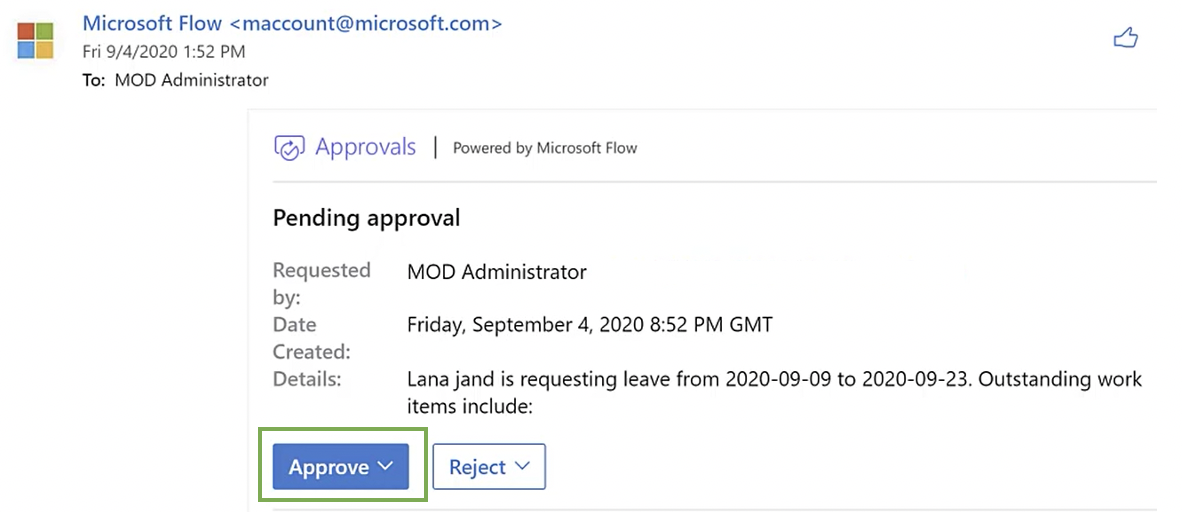
- You should see an approval email in the inbox you sent the supervisor email to, select Approve
![Approve Email]()
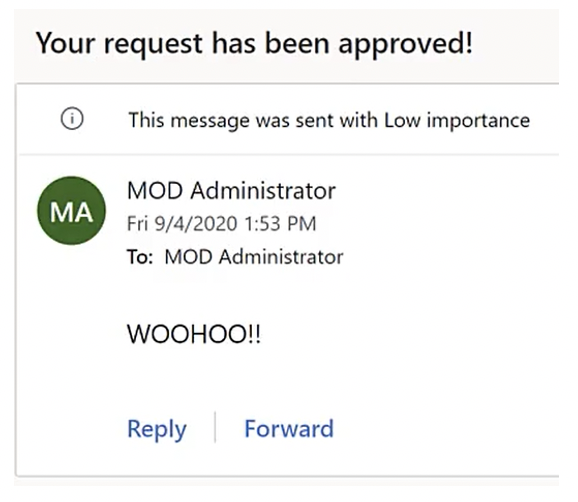
- Another email will be sent to the employee’s email with the response
![Approved Request]()
Final Thoughts
Congratulations! You have completed the Leave Request app using the Common Data Service, a Model-Driven App, a Canvas App, and Power Automate. You have a fully functioning application that can be used right away! The next steps would be to implement a status field where the Approve or Reject decision will be updated in the Model-Driven App so supervisors can keep track of any pending requests. This app can be adjusted to your organization’s needs and requirements, but this app is a great starting point.
INFOPATH FORM MODERNIZATION WITH POWER PLATFORM
Discover how we helped a Fortune 100 Insurance Company modernize their InfoPath forms with Power Platform.
The post Build a Leave Request App with Power Apps appeared first on Applied Information Sciences.