You may consider adding a related subgrid to your portal if you have tables associated with each other. For example, you have a Trip table that is your main table and a Traveler table. You want your traveler table to be directly related to your trip table so that any data you add to your traveler table for a specific trip will be added to that trip and not all.
The steps to achieving this include creating the relationship between tables, modifying the forms and views, adding the related subgrid to the main Trip form, and configuring the Portal Management App and portal designer.
I have created a Trip Planner application where Trip is the main table and Traveler is the related table in this walkthrough. By the end, we will have one Trip to many travelers and ensure the travelers for one Trip don’t get added to a different trip.
Image may be NSFW.
Clik here to view.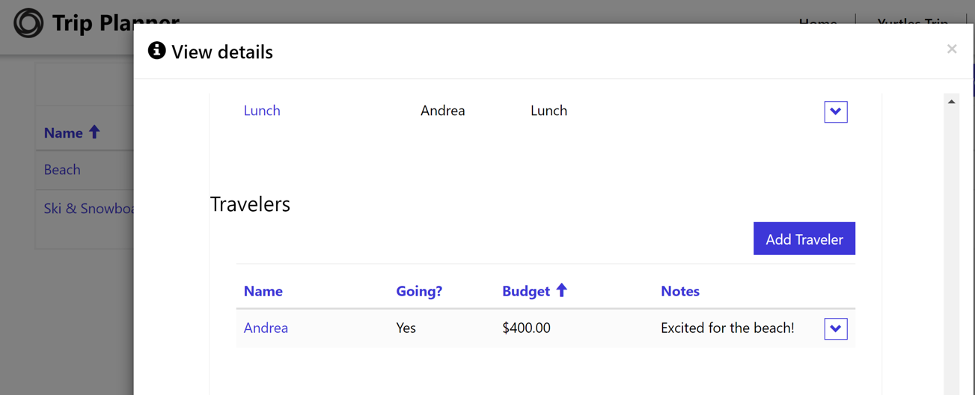
This example image is what the Traveler subgrid will look like inside the beach trip.
Steps:
- In your solution, create a Trip table with custom columns
- Create a Lodging Table
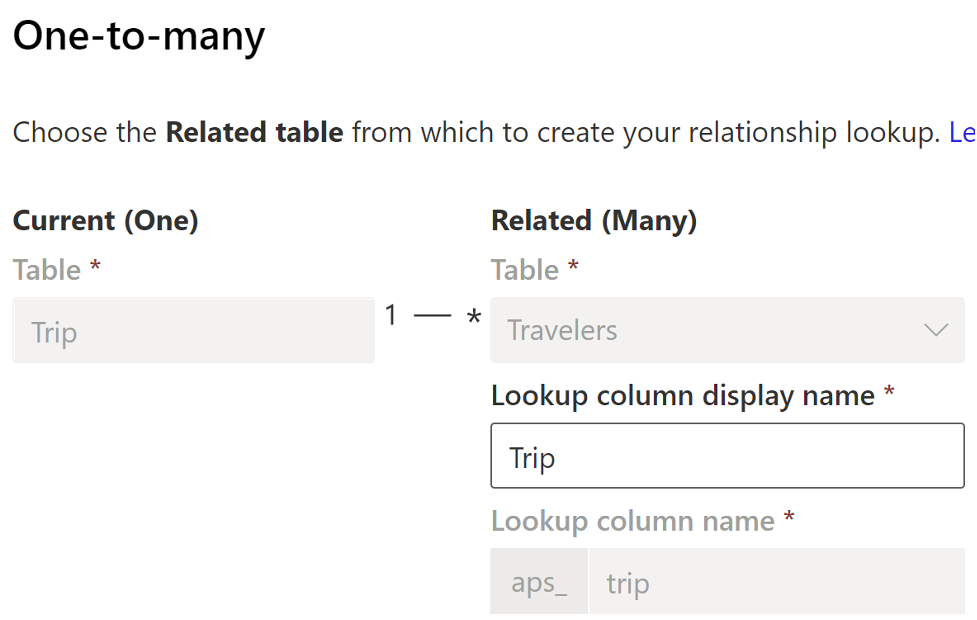
- Create a 1:M relationship between Trip and Travelers
Image may be NSFW.
Clik here to view.
- Customize the view for both Trip and Traveler
- Add a new Main form inside the Trip table
- Add custom columns by dragging or clicking it from the left panel
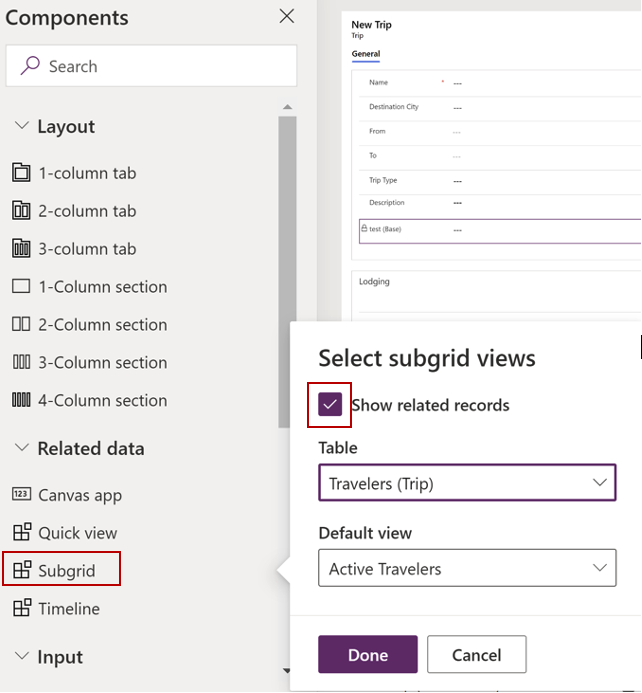
- Add a related subgrid in the same tab
Image may be NSFW.
Clik here to view.Image may be NSFW.
Clik here to view. - Save and Publish the form, Click Back
- Navigate to the Portal Management App
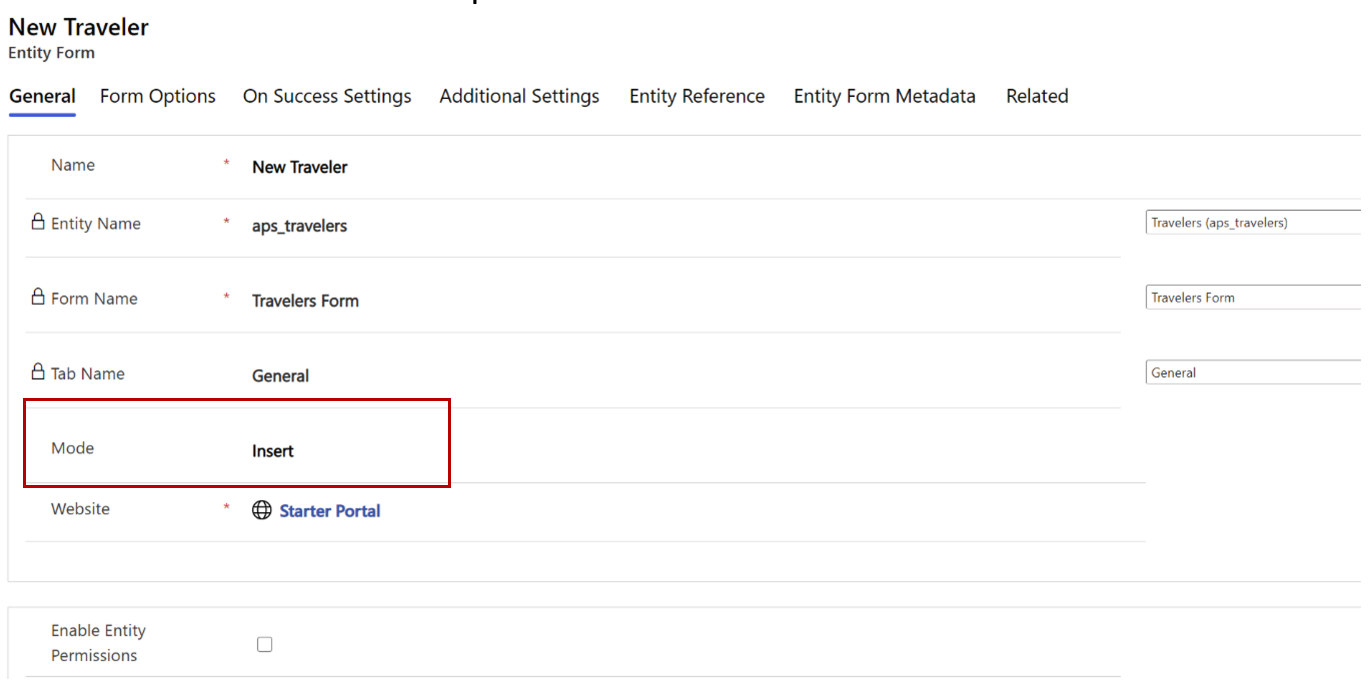
- Create 2 new Entity Forms
- One for “New Traveler”
- One for “Update Traveler”
Image may be NSFW.
Clik here to view.Image may be NSFW.
Clik here to view.
- Create a new entity form called “Update Main Form”
Image may be NSFW.
Clik here to view.
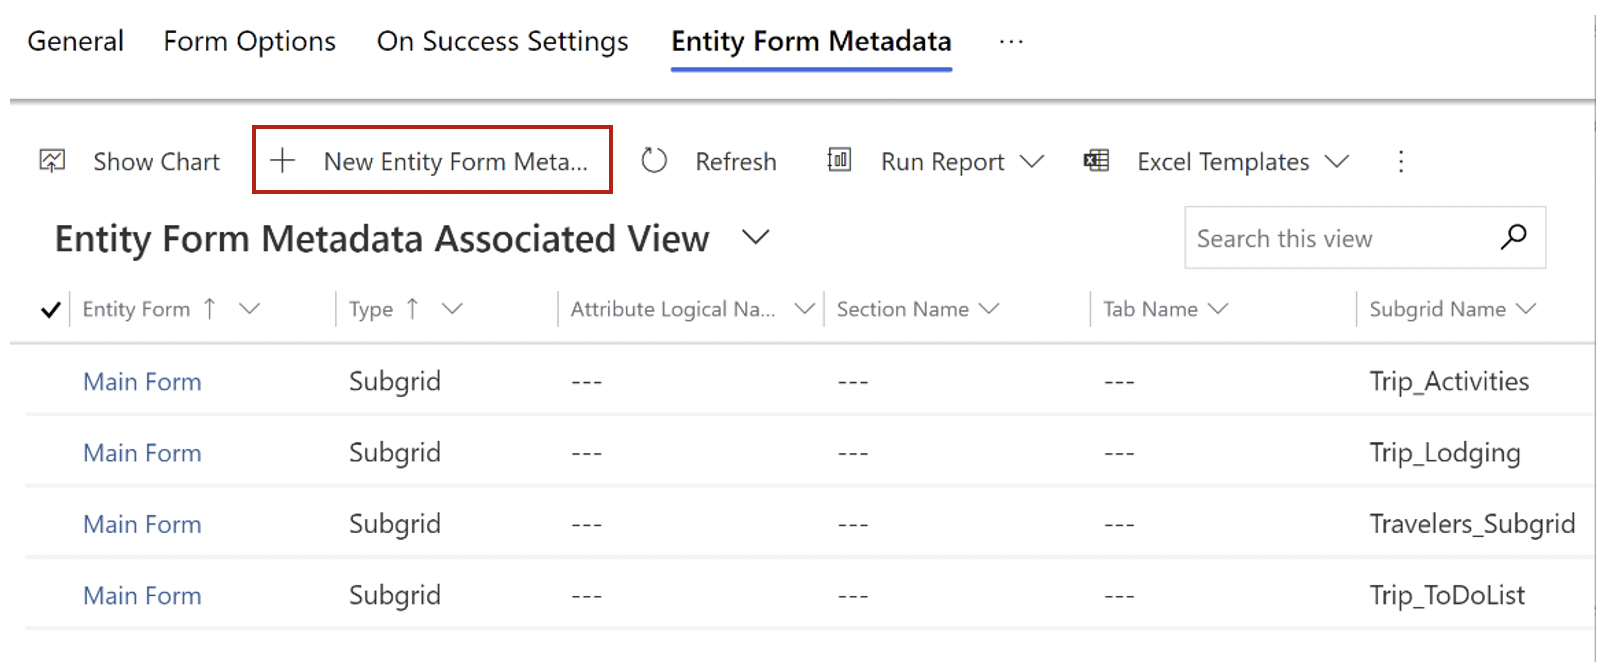
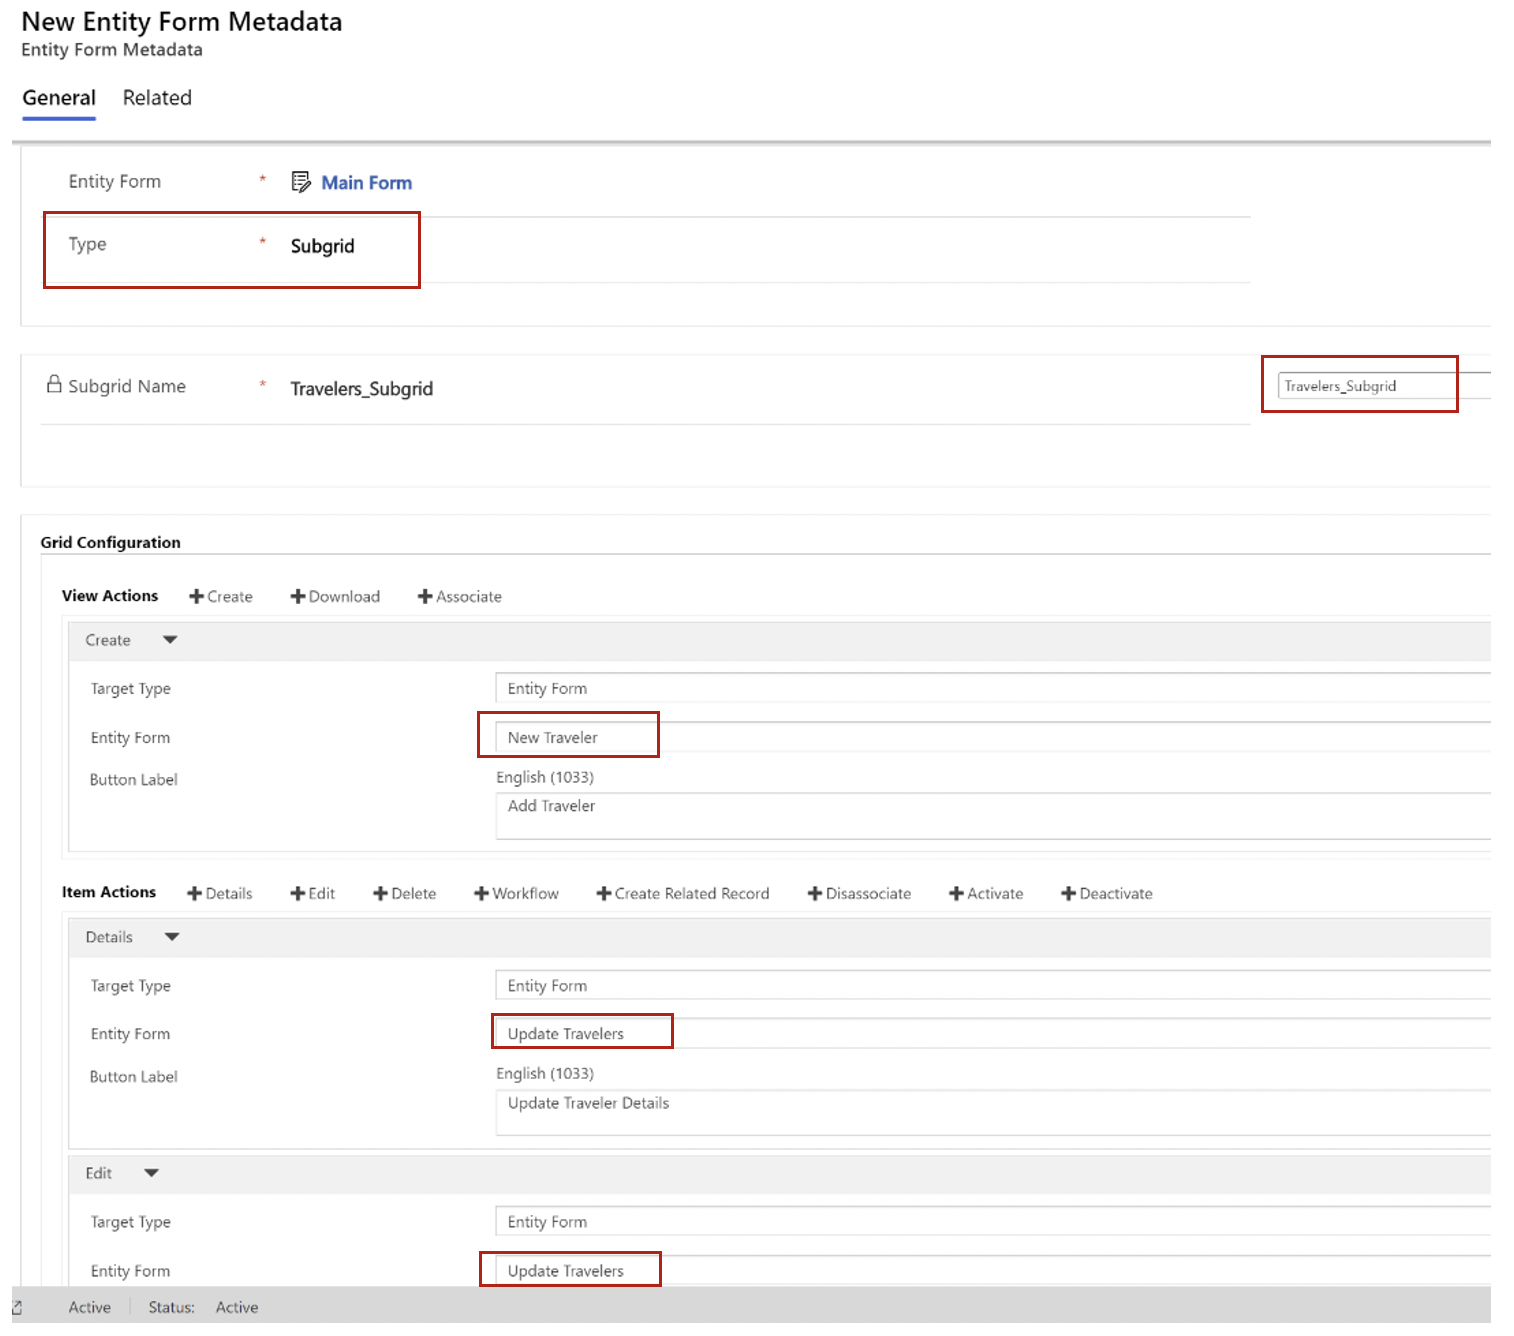
- Navigate to Entity Form Metadata tab, click New Entity Form Metadata
- Select Subgrid from Type
- Select the correct subgrid from the drop-down
- Select the New Traveler form for Create
- Select Update Traveler form for all other actions
Image may be NSFW.
Clik here to view. - Create an Entity form called “New Main Form” and follow the same steps for the subgrid configuration but ensure the Mode is Insert in the General tab
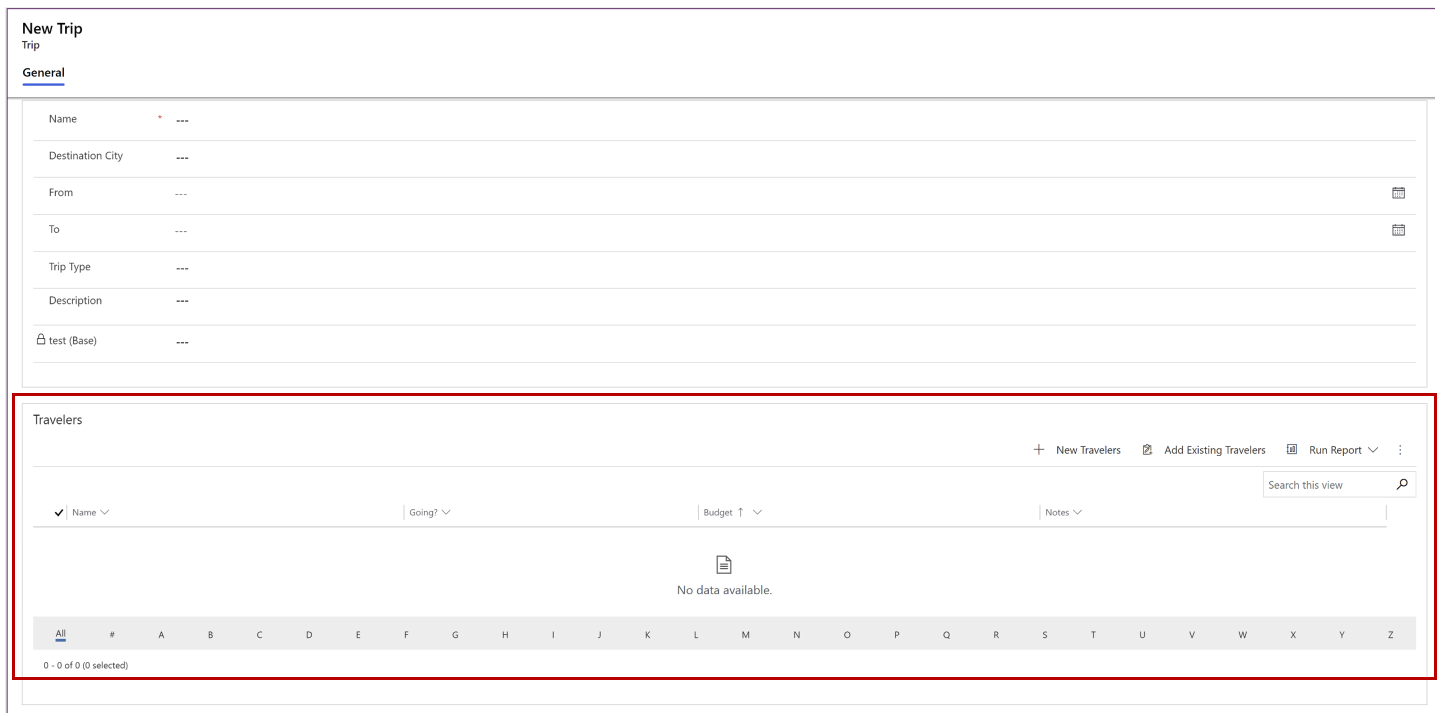
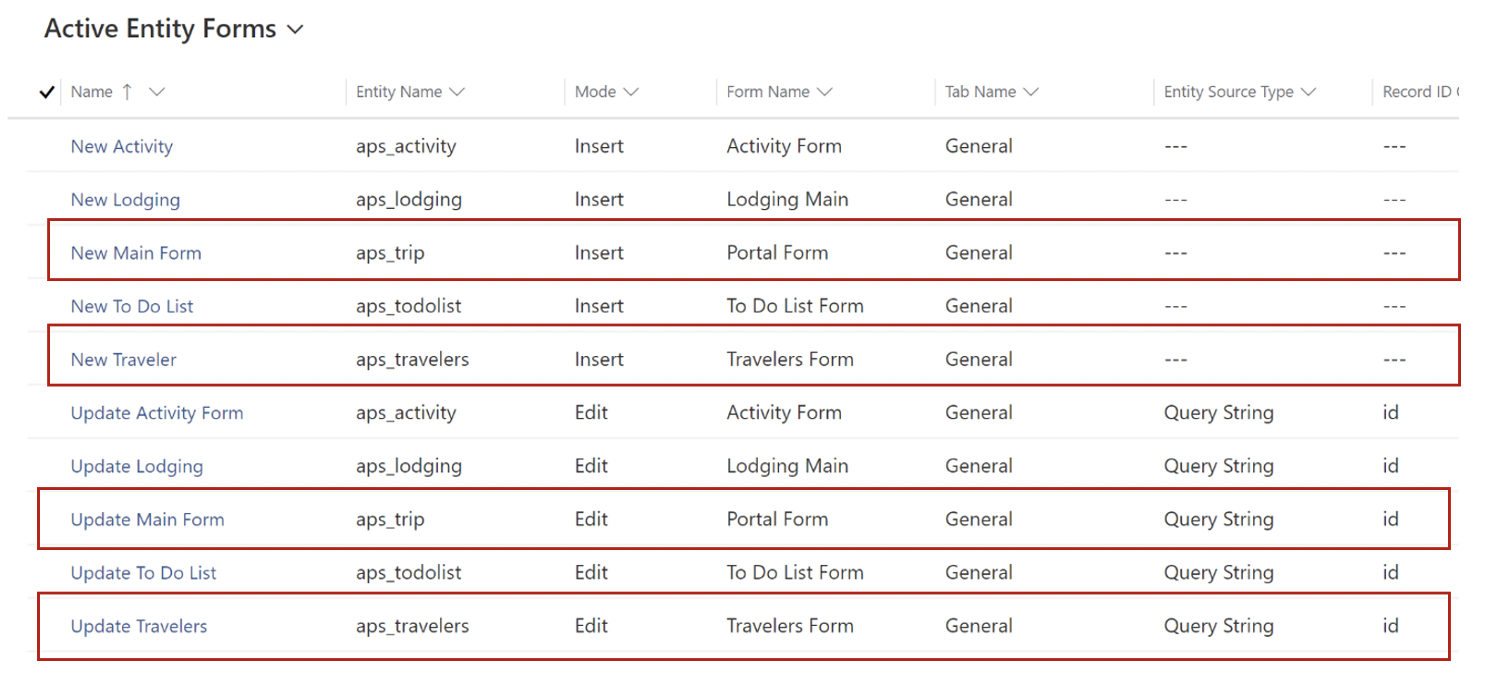
- Your Entity Forms should look like this
Image may be NSFW.
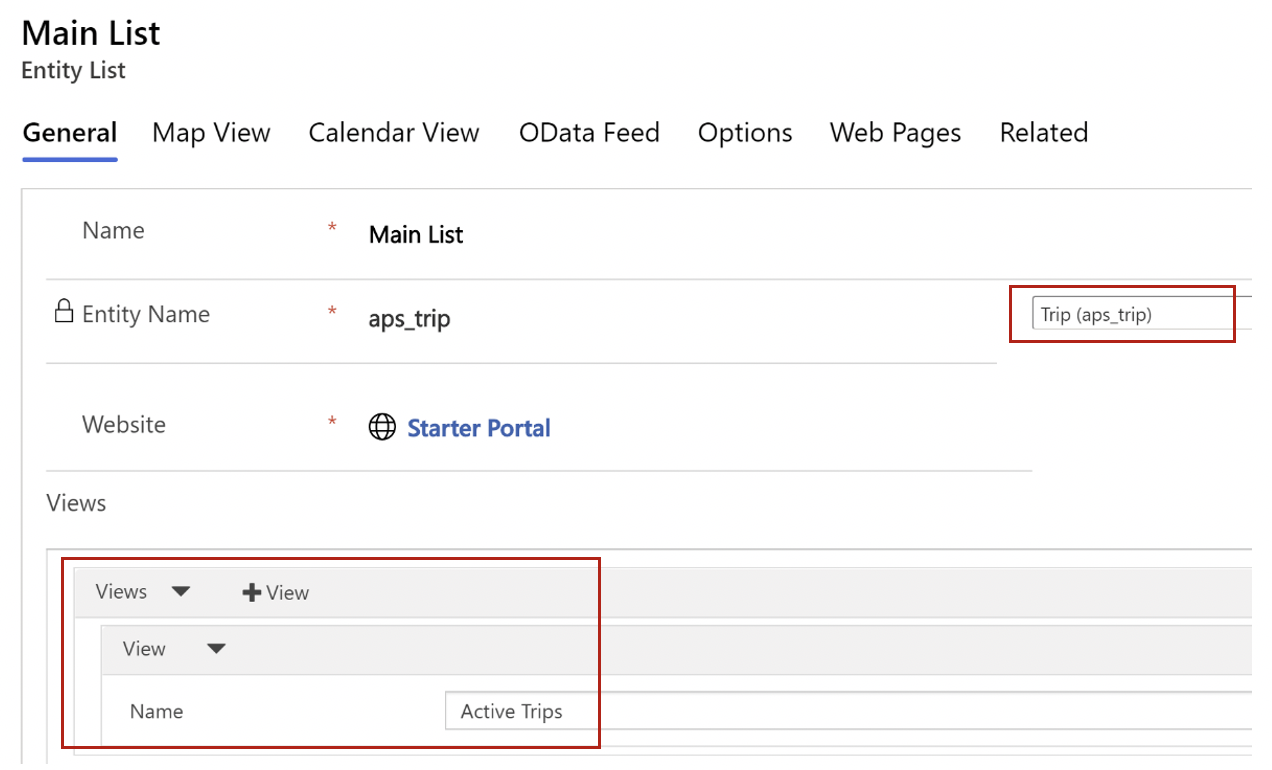
Clik here to view. - Navigate to Entity Lists inside the Portal Management App and create a new list called “Main List”
Image may be NSFW.
Clik here to view. - Under the Options tab, Add Main Form to Grid ConfigurationImage may be NSFW.
Clik here to view. - Navigate to the Portal Designer editor
Image may be NSFW.
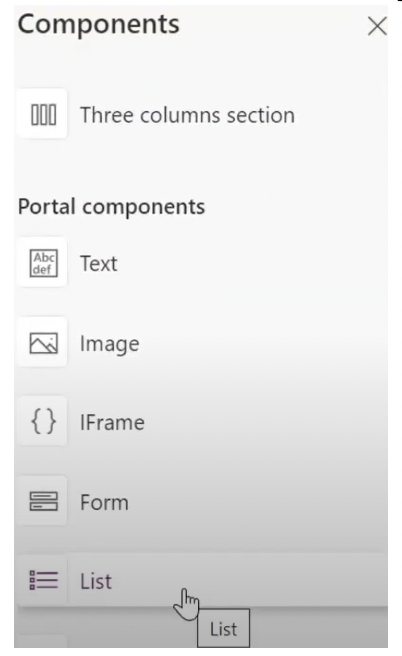
Clik here to view. - Add a List from Components
Image may be NSFW.
Clik here to view. - Select Use Existing, since we already created an Entity List in the Portal Management app
- Select Main List
Image may be NSFW.
Clik here to view.
- Select Main List
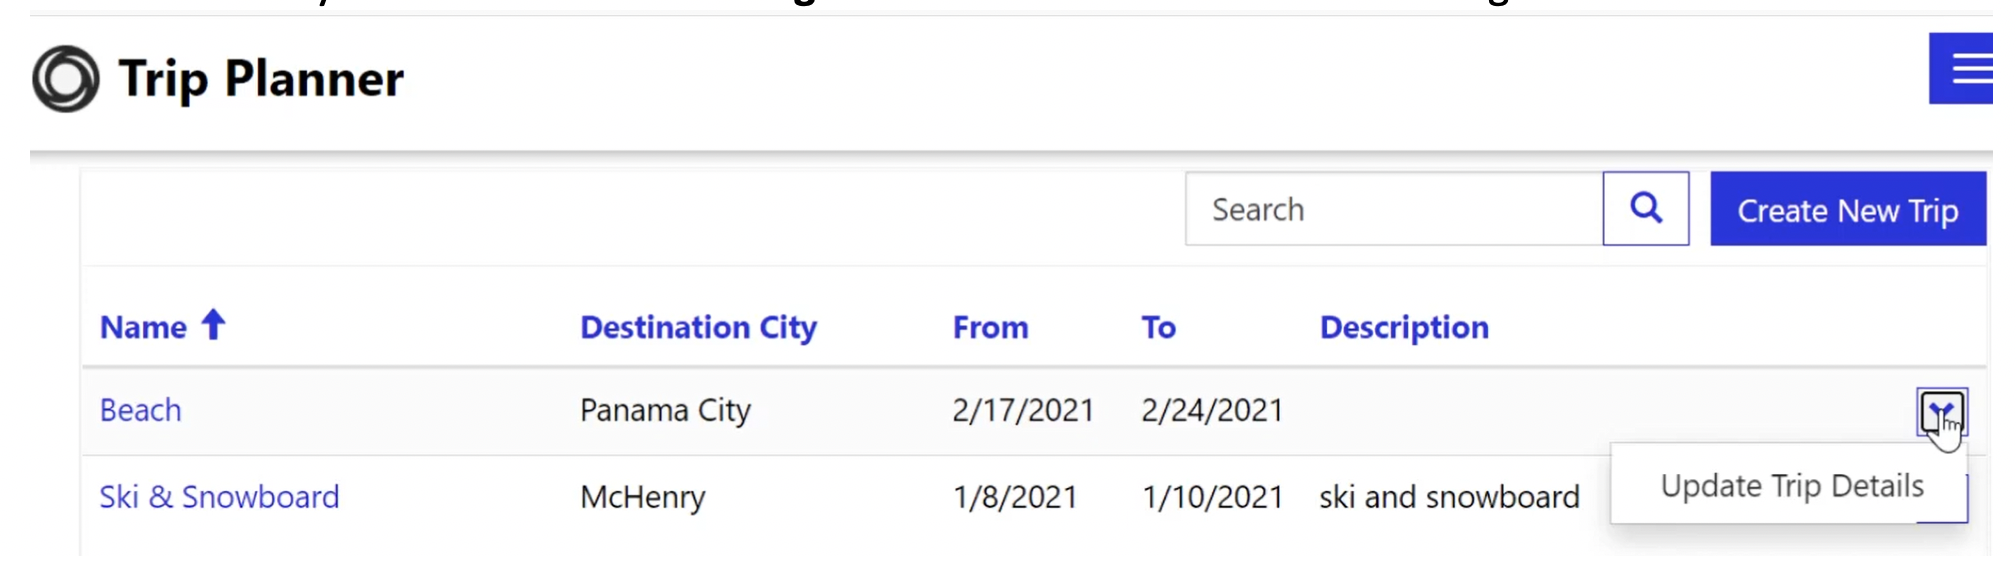
- Click Sync Configuration, then Browse Website
- You’ll see your Trip view and you’ll be able to Create New or Update an existing Trip
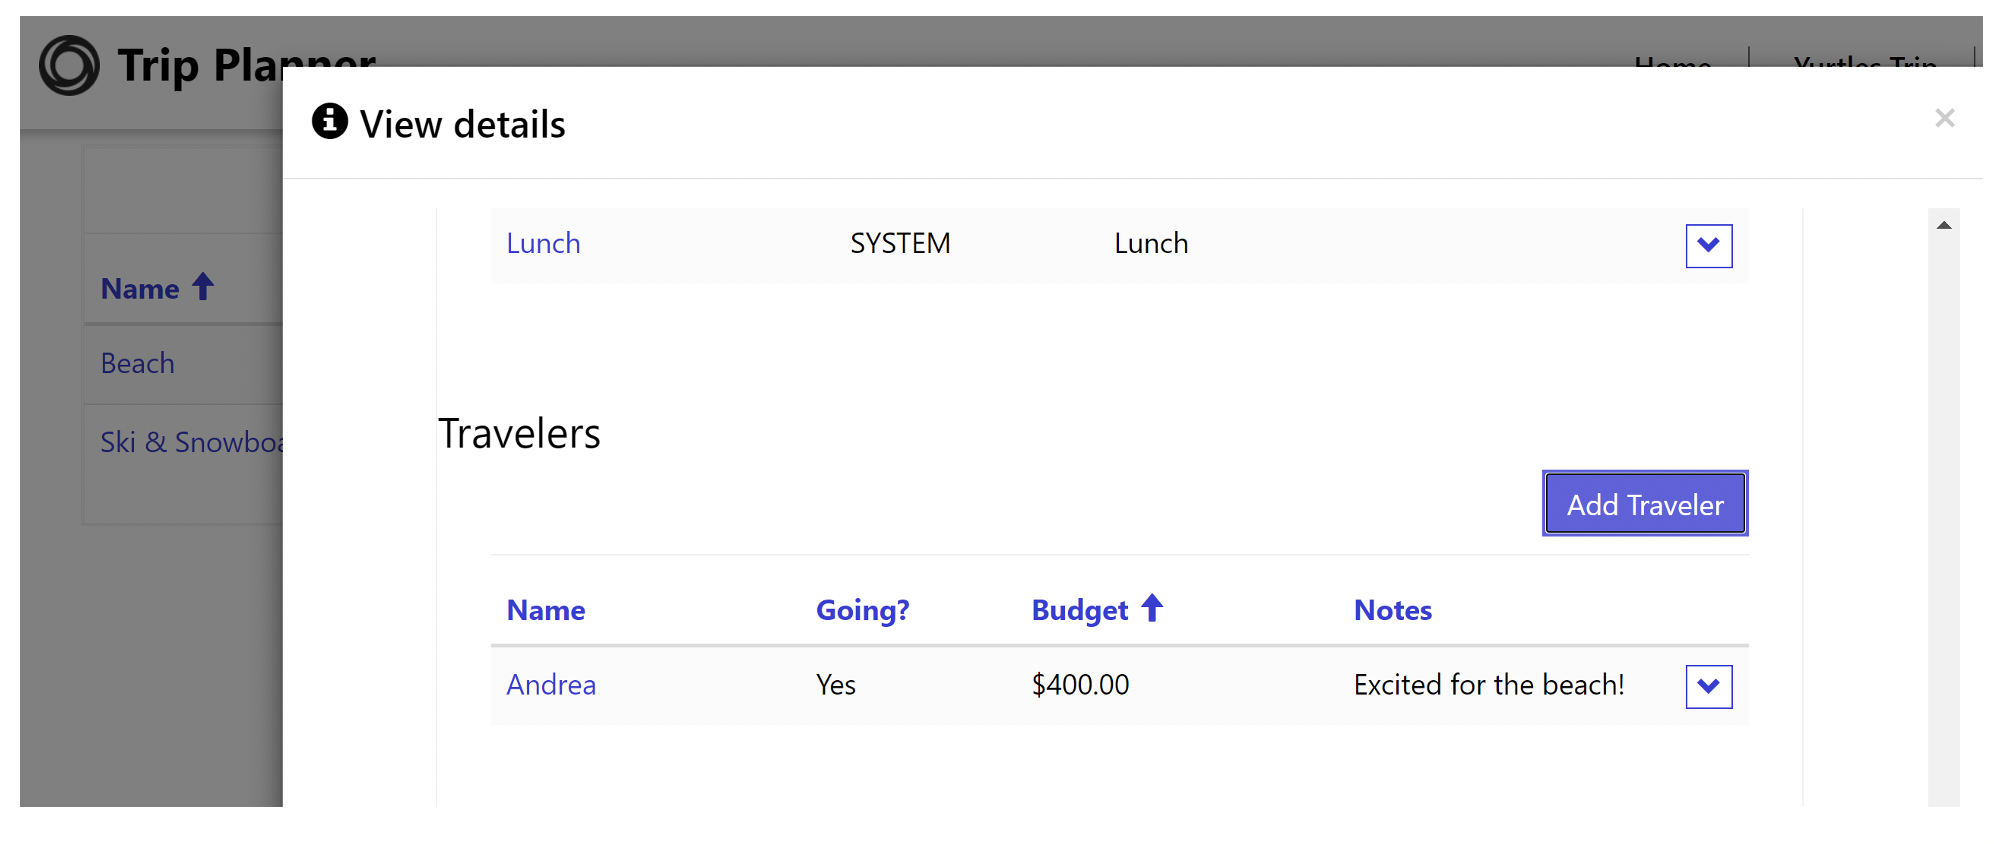
- Notice your related Traveler subgrid is added to both forms for editing
Image may be NSFW.
Clik here to view.![Related Traveler Subgrid for editing 1]()
Image may be NSFW.
Clik here to view.![Viewing Trip Details]()


As you can see, adding a related subgrid to your Power Apps Portal can be done out of the box with no code needed! The purpose of this is to be able to link multiple tables to each other and have them displayed in Power Apps Portals. Feel free to follow along using my instructional video for more detailed instructions.
The post Power Apps Portals: Adding Related Subgrids appeared first on Applied Information Sciences.